Module 2: Installing Python, VS Code and Some Extensions
Game development is a tiring process. There are many things to consider, from game engines to programming languages to sound, and more. Choosing the right engine is especially important since engines typically support only one language. But knowing a few extra languages might be beneficial.
The first game engine we’ll talk about is Godot, but the language used is similar to a more common language, Python. So, we’ll be learning a bit of that first. I’m sure all of you know what Python is, but if you don’t, here’s a short introduction. Python is a programming language Guido van Rossum and was first released in 1991. It is primarily implemented in another programming language, C.
Now, what makes it suitable for beginners? The syntax is beginner-friendly and clean, allowing you to easily start writing new programs after seeing a few tutorials. It runs seamlessly on all platforms. You don’t need to define the types of variables explicitly (we’ll talk more about this later). It has a rich library that supports many tasks like downloading YouTube videos or even replying to texts in WhatsApp (yup, dunno why it’s a thing). The library we’ll be focusing on here is Pygame, great for making simple 2D games.

We don’t need to know the other languages right now, but here are some common ones, just for your knowledge:
- C++ boasts high performance and extreme control over resources. It also supports OOP (object-oriented programming). It is commonly used in developing AAA games and engines like Unreal Engine.

- C# is component-oriented and is strongly integrated with the .NET framework. It is also the primary language of Unity, another game engine.
- JavaScript is event-driven and runs well in browsers. It is mainly used in making web-based and browser games.

- Java is platform-independent and object-oriented, making it a popular choice for mobile games.
Let’s stick to Python for now. Installing it is pretty straightforward. Since I am on a Windows laptop, I’ll be running you through the process for Windows, but I don’t think it’s much different for macOS or Linux. First, open your browser and go to their official website, or just go directly to the Downloads section from here. I’ll suggest always downloading the latest stable version instead of the pre-released one, as it has fewer bugs, and honestly, most coders won’t usually notice the difference between the two versions.
After the launcher has been downloaded, run it. The window shows two checkboxes. First, admin privileges. You’ll need this if you want to install Python for all users. It will also allow you to change the installation folder. Second, add to PATH. This places the executable in the PATH variable after installation. You can also manually add Python to the PATH environment variable later. I’ll recommend ticking both of them since it’ll help later.

You can directly select “Install Now” or customize the contents yourself. I don’t recommend going for the latter unless you know what you’re doing. After installing, it’s a good practice to verify if it’s installed properly. You can either go into command prompt and type in the following command:
python --version
Or run the installer again and click on “Repair”.
Another thing we’ll need is pip. It is Python’s package manager used to install and manage additional libraries and dependencies. If you had clicked on “Install Now”, it would’ve installed by itself. To check the version, go to command prompt again and run the following command:
pip --version
If you get an error message instead of a version number, you need to install it manually. Follow any one of these steps:
- Using ensurepip: The ensurepip module is built into Python and can install pip if it’s missing. To install pip using this, go to command prompt and run this command:
python -m ensurepip --upgrade
- Using get-pip.py: First, download the get-pip.py script using the curl command:
curl https://bootstrap.pypa.io/get-pip.py -o get-pip.py
Then, install pip with the following command:
python get-pip.py
Following one of these two will ensure a successful pip installation. To verify, go to command prompt, and type in:
pip --version
A version number will show. Also, if you’ve been wondering how to open command prompt, press the Windows button and type in cmd. The command prompt should show. Keeping pip updated is important. To upgrade pip, run the following command:
pip install --upgrade pip
And if a newer version of pip starts performing badly, it is best to downgrade it with the following command:
python -m pip install pip==[version_number]
With that done, now what you need is an editor. We’ll use Visual Studio Code, one of the most versatile and user-friendly editors available. VS Code is a free, lightweight, and open-source code editor developed by Microsoft. On top of Windows, it also supports macOS and Linux. Some of its useful features are:
- Syntax highlighting which enhances code readability.
- Integrated debugging that allows you to debug the code within the editor itself.
- Built-in Git integration.
- A wide range of extensions for easy coding.
First, we’ll look at how we can install VS Code, then we will go through some of my favourite extensions. Go to the official website of Visual Studio Code through your web browser, or directly click on the link here to go to the Downloads section. Click the big rectangle Download button under the Windows logo, and the setup will be installed. After the Installer opens, it will ask you to accept the terms and conditions of Visual Studio Code. Click on “I accept the agreement” and then click the Next button.

Choose the location data for running Visual Studio Code. It will then ask you to browse the location. Then click on the Next button. Then it will ask to begin the installation setup. Click on the Install button. After the download is complete, launch the application. Now, let’s head to the marketplace and download some useful extensions. Here are some ones I recommend:
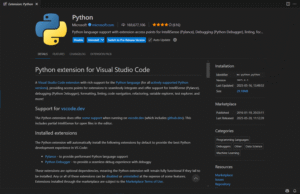
- Python: This is an essential extension for writing Python programs. Developed by Microsoft, it has features like formatting, linting, code navigation, refactoring, variable explorer, test explorer, and more.
- Pylance: This gets installed automatically when you install the above extension. It enhances the Python extension by adding type checking, faster IntelliSense, and better language features.

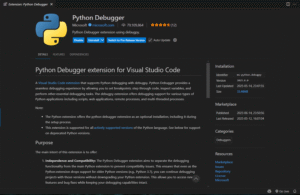
- Python Debugger: It also gets installed automatically by the Python extension. It is needed to debug the code in the editor itself. It allows you to set breakpoints, step through code, inspect variables, and perform other essential debugging tasks.
- Bookmarks: The Bookmarks extension enhances navigation in VS Code by allowing you to add, manage, and jump between bookmarks in your code. This makes it easier to track important lines, revisit key sections, and switch between locations quickly, especially useful in large files or while debugging.

- GitHub Copilot: GitHub Copilot is an invaluable and one of the best VS Code extensions, revolutionizing code development. Seamlessly integrated, Copilot intelligently generates code suggestions as you type, leveraging machine learning to comprehend context and provide instant snippets.
- GitLens: This is useful, especially if you have different users on one device. It simplifies version control by letting you track changes across your codebase with ease. You can view detailed history, see who made what changes and why, and explore how your code has evolved, all without leaving your editor.
- google-search: You can directly run Google searches with the help of this extension. Just select the word or function you want to search, then right click and click on Google this in the drop-down menu.
- Material Icon Theme: This allows you to create descriptive icons to categorize between files and folders easily. This is one of the best VS Code extensions that helps to make code more visually appealing so that it is easier for teams to work in close collaboration.
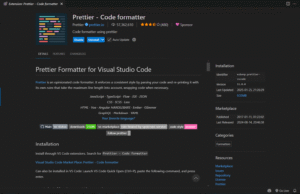
- Prettier: Prettier VS Code extension helps you spend less time on code formatting by automatically fixing common issues like inconsistent quotes, missing semicolons, or spacing. It’s considered one of the best VS Code extensions for ensuring consistent code style across your project and gives you the flexibility to customize formatting rules.
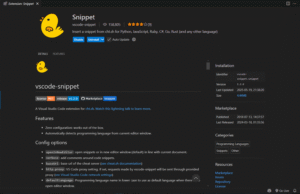
- Snippet: Snippet provides a collection of various extensions for the commonly used programming languages. The React Snippet is the most commonly used extension nowadays.
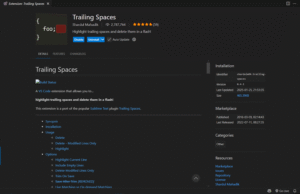
- Trailing Spaces: This extension allows you to highlight trailing spaces at the end of your lines and delete them.
These extensions will greatly help you if you want to write Python programs efficiently. Of course, there are many other extensions for almost all languages. Some examples are: Live Server (which allows you to launch a developmental local server with live reload), Unused CSS classes for JavaScript (which highlights the classes that you don’t need, optimizing the code), HTML preview (which allows you to preview .html and .svg files in VS Code), and more.
And be careful while downloading extensions. Extensions operate with the same permissions as VS Code itself, allowing them to read and write files, execute code, and access network resources. Before installation, review the extension’s ratings, user reviews, update history, and verify if the publisher has a blue checkmark indicating a verified identity. Also, update your extensions and remove the ones you no longer need.
That covers the basics of how you can create the space for writing your programs. Next time, we’ll go through some simple coding concepts. We’ll talk about variables, numbers and text. We’ll also see how we can print simple messages.
Discover more from Ge-erdy Verse
Subscribe to get the latest posts sent to your email.