Game Dev Reference #3: My First Game in Godot
After two games in Python, I’ve been feeling confident. Confident enough to move to a proper game engine. Godot. Looking back, I guess I should’ve made some more games with pygame, but Godot worked out fine, so meh, I guess. Well, here is the devlog (or how I went about creating) of my first game in Godot, PHRENZIED. Check it out (it’s cheap) and give me feedback!
Sup gamers, Sloth here, and if you haven’t guessed already, today I’m gonna talk about my experience making a maze runner in Godot. So, Reaper suggested the game idea (again, I know). Dude just has too many ideas lying around in his brain. So, what is Godot? Free and open-source, check. Game script similar to Python, check. Good for 2D and basic 3D, check. Gentle learning curve, check. Sounds good?
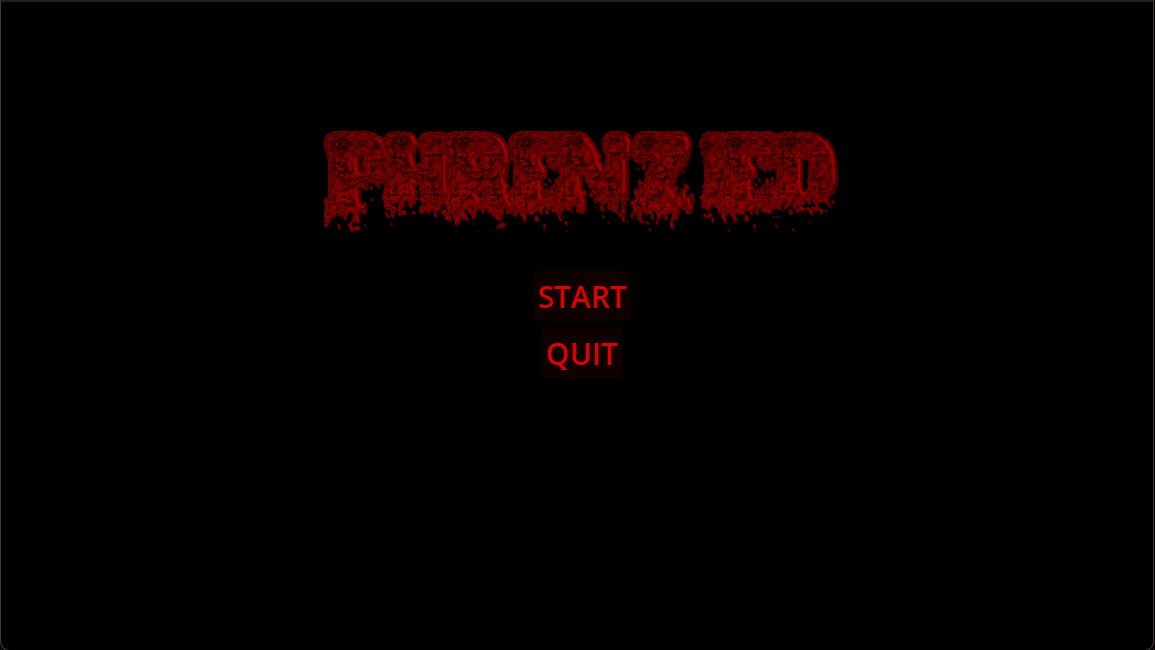
The logic of the game was simple as always. A guy will go through some mazes, and bosses will chase him. And the theme of the game was schizophrenia, so the bosses were ghosts, there was a moving maze, symbolizing instability, and there were some text screens from the boy’s POV after each level.
The first level has a pretty simple maze, and one ghost that comes from the middle of the map and chases after the boy. This level is called the “Conscious Mind” and represents the period when you’re still close to reality. So, the maze isn’t too difficult. Then comes the “Lucid Mind”. Here, you’ve gone deeper and are more detached from reality. That’s why I added two ghosts here, and they move a little faster, too. Rather than the middle, they spawn at the top-left and top-right corners and follow you from there.
The third level, the “Subconscious Trench,” lives up to its name. You get walls that move and ghosts that zoom across the map. These symbolize extreme illusions, those found in the lowest level of consciousness. Or is it? Nope, you can go deeper. It’s either that, or you wake up. Going deeper means you become a ghost yourself, haunting other versions of you. Let’s go through how you can make your own game in Godot.
Coming to the nodes first. Nodes are the basic blocks of Godot, like atoms. Each node serves a specific purpose, displaying graphics (Sprite2D), handling movement (CharacterBody2D), creating collisions (CollisionShape2D), playing sound (AudioStreamPlayer2D), or more. When you combine many nodes, you get a molecule, or in Godot terminology, a scene.
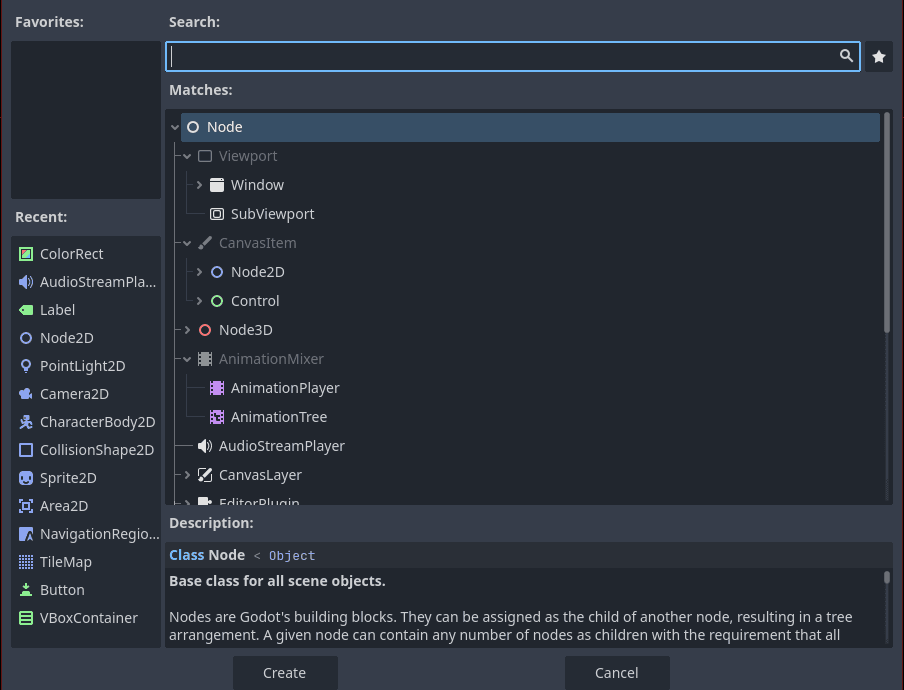
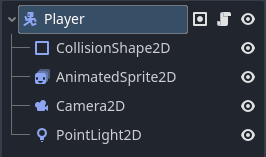
Scenes are basically collections of nodes in a tree-like format. Scenes can represent anything from, say, a character to an entire level. Let’s take the example of our boy in the game. I named his scene “Player” and gave him a root node Node2D, since he is a 2D character. The child nodes are as follows:
- CollisionShape2D, since he can’t go through walls.
- AnimatedSprite2D, since the animations will be different when he’s moving right, instead of left, up, or down.
- Camera2D, since I want the focus to be on him. This node keeps him at the centre of the screen always.
- PointLight2D, since the rest of my map is dark and I want a light source around his body, to see the walls around you.
What’s really useful about scenes is that they are reusable. Let’s say you create a scene for a character. You can create instances of it at different levels. This modular approach allows scalability and efficient organisation in your project. You can build complex game structures by composing simpler scenes. And the code is the string that ties everything together. Like, i made a scene for explaining a level, then added a Button node that would trigger the next level when pressed.
Let’s take a look at the code of my Player scene. The child nodes don’t have any script, but the root node has one. The script is:
    extends CharacterBody2D

@onready var animated_sprite = $AnimatedSprite2D

var color: String
var speed = 100

func _physics_process(delta):
	movement_input()
	move_and_slide()

func movement_input():
	var input_direction = Input.get_vector("ui_left", "ui_right", "ui_up", "ui_down")
	velocity = input_direction * speed

	if Input.is_action_pressed("ui_left"):
		animated_sprite.play("player_side")
		animated_sprite.flip_h = false
	elif Input.is_action_pressed("ui_right"):
		animated_sprite.flip_h = true
		animated_sprite.play("player_side")
	elif Input.is_action_pressed("ui_up"):
		animated_sprite.play("player_up")
	elif Input.is_action_pressed("ui_down"):
		animated_sprite.play("player_down")
	else:
		animated_sprite.play("player_idle")
		animated_sprite.flip_h = false
First, I called the CharacterBody2D class, as it has built-in functions like move_and_slide() to handle movement and collision detection. Then, I created a variable, animated_sprite, that references the AnimatedSprite2D node. @onready means the node will become active as soon as the scene runs. I declared two variables, color and speed. The _physics_process(delta) function gets called every frame and has two functions: move_and_slide(), which handles collisions automatically, and movement_input(), which handles player input and sets the velocity.
The function movement_input() is pretty straightforward. First, I created a variable input_direction that stores the direction the player faces, based on the user’s input. And the velocity multiplies that by the speed. The animation part is more complex. You have to create a node AnimatedSprite2D, then add animations with different names. The inputs “ui_left”, “ui_right”, “ui_up”, and “ui_down” are defined by default in Godot, so we just use them. In the left part, I set the flip_h to false, so that the player faces left. Similarly, in the right, flip_h is true. flip_h is a boolean that flips the sprite horizontally when set to true.
This was the breakdown of the script I used in the Player scene. For the ghost that follows the player, the script is:
    extends Node2D

@export var speed: float = 30.0

var player: Node2D

@onready var anim_sprite: AnimatedSprite2D = $AnimatedSprite2D

func _ready() -> void:
    var players = get_tree().get_nodes_in_group("Player")
    if players.size() > 0:
        player = players[0]
    else:
        push_error("No player found in group 'Player'!")

func _process(delta: float) -> void:
    if player:
        var direction = (player.global_position - global_position).normalized()
        global_position += direction * speed * delta
        if abs(direction.x) > abs(direction.y):
            if direction.x > 0:
                anim_sprite.play("ghost_right")
            else:
                anim_sprite.play("ghost_left")

func _on_area_2d_body_entered(body: Node2D) -> void:
    if body.is_in_group("Player"):
        get_tree().change_scene_to_file("res://Scenes/GameOverScreen.tscn")
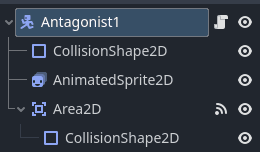
We already know about the extends node2D and speed part. I created a variable for the player. Then, there is the variable for the sprite. The function _ready() runs once when the root node of the antagonist is added to the scene. It looks for nodes in a group “Player”. For this, i had to add the Node2D of my Player scene to that group. If any players are found, they’re stored in the variable player. Otherwise, it shows an error.
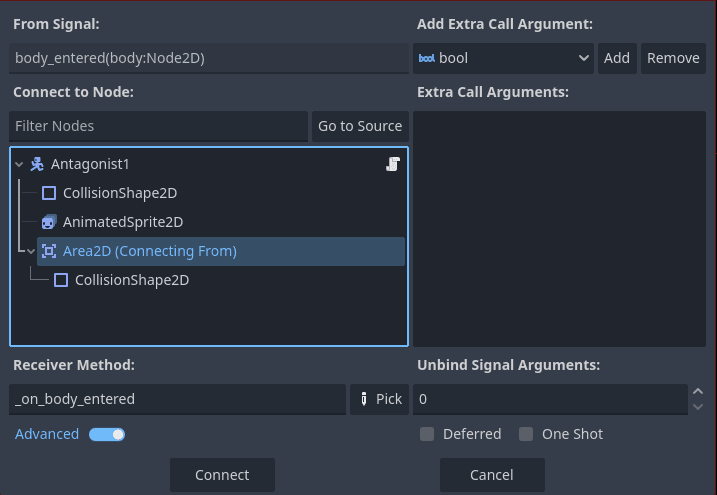
The function _process(delta) calculates the direction you are in, then moves the ghost towards you with constant speed. There are animations for different directions, just like earlier. Finally, the collision detection. So, I needed to trigger a game over when the ghost hits the player. So, I gave the ghost an Area2D node with another CollisionShape2D as its child. I added a function from the editor for when anything enters the area, then defined the function to check if it belongs to the group “Player”. If yes, then it switches to another scene, the game over scene.
Those are the explanations for the player and ghost scripts. Now, just the scripts aren’t enough, so you’d do better to keep an eye on the modules that we upload to our website. They are for beginners and will help you greatly if you want to enter the world of game development, but don’t know where to start. So long, peeps. Happy procrastinating!
Discover more from Ge-erdy Verse
Subscribe to get the latest posts sent to your email.

